Procreate 5.2 Update: 5 Best & Most Useful Features
Procreate has finally released a much anticipated update. You can now update your favorite drawing app to a 5.2 version.
Some of the changes and new features have been announced before the actual release. Obviously, artists and art enthusiasts could not wait to try them all out.
Today, as we all got the Procreate 5.2 update I tested all the new features myself. First and foremost, they are all great. Secondly, for some of them I was really looking forward to for quite some time. As an illustrator who uses Procreate every day to create illustrations and artworks, I’m really enjoying the new stuff.
If you are wondering what new cool tools we got with this latest update, I am happy to share my experience. Procreate 5.2 brought long awaited additions and options. Here is the list of the best and most useful Procreate 5.2 features:
- Brush sizes memory
- Stroke stabilization
- Resent brushes tab
- Palette cards
- Page assist (Easy sketchbook mode)
1. Brush sizes memory
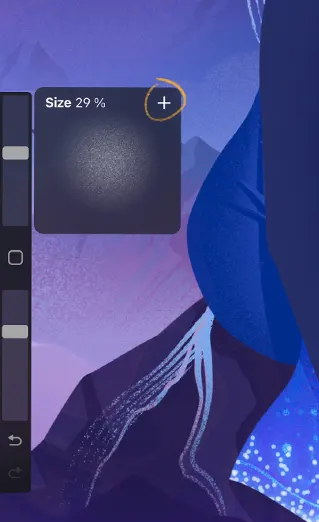
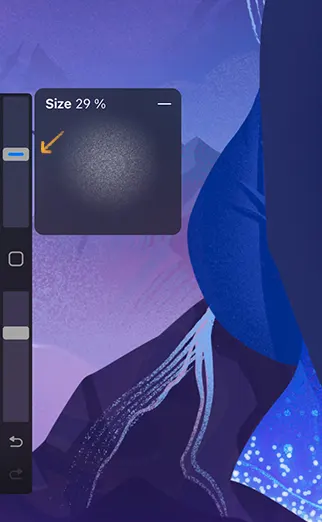
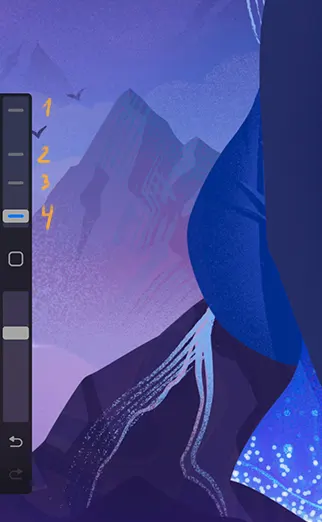
This awesome feature from Procreate 5.2 update allows you to save the exact size of your brush and easily access it any time you need to use it in future. It really helps when you need to make strokes of the same width in your drawing. It’s really useful when you are working on a series of illustrations and want to have the same consistent aesthetics.
Brush size can be saved up to 4 times and appears as a small mark on your slider. When you are changing the size it easily snaps to your mark when being near it.
The same applies to Opacity slider.
You can save your settings for every brush you use. And Procreate will remember these exact settings across all canvases you create. Neat!
2. Stroke stabilization
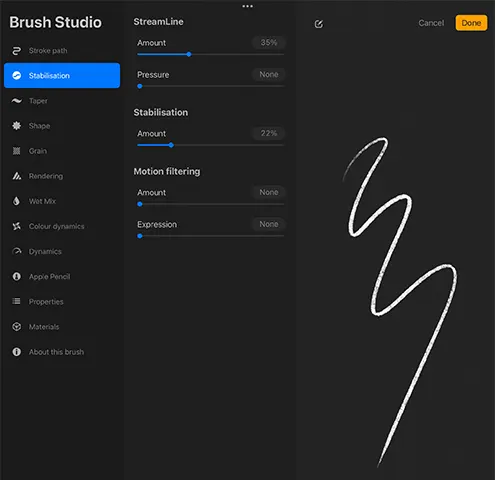
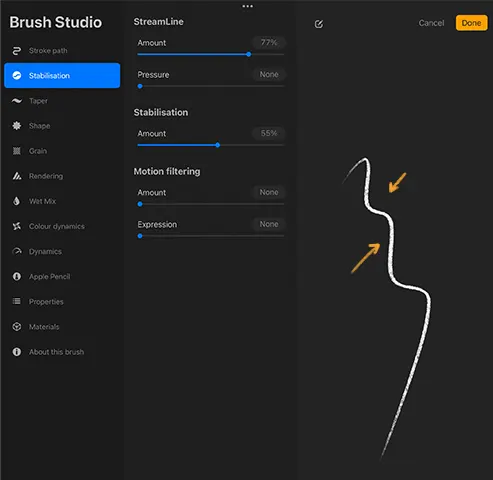
I don’t really have a shaky hand (well, most of the time), but this feature is just perfect for creating smooth outlines and gentle curves.
From now on you can customize every brush (via tapping on it in the brush library and accessing the brush settings). Stabilization has several sliders for stream line, stabilization and motion filtering that determine the behavior of your stroke and allow to control the stroke smoothness.
It reminds a bit of stroke stabilization we already had for lettering brushes, but this new setting is much more intuitive and powerful.
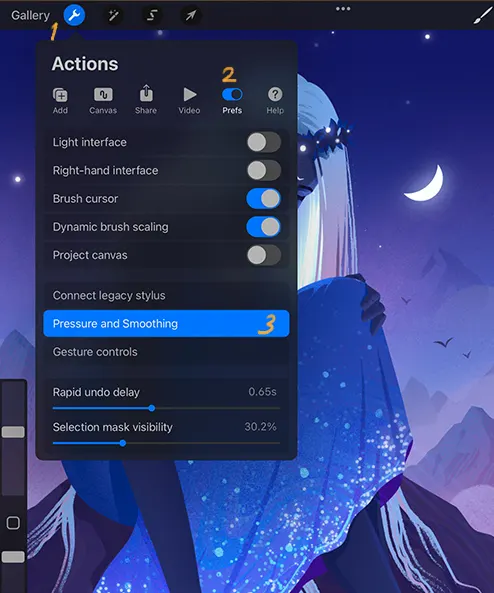
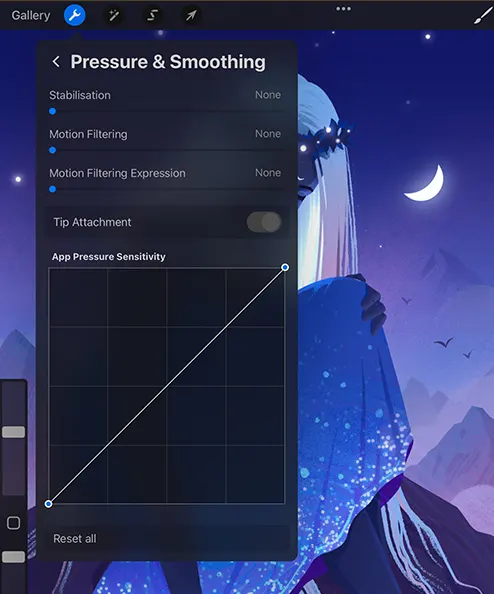
On a side note, I’ve found that there are also global stabilization settings hidden under Actions > Prefs > Stabilization and Smoothing. These are applied to all your brushes on top of their current individual settings. This way you can stabilize all your brushes at once.
3. Recent brushes
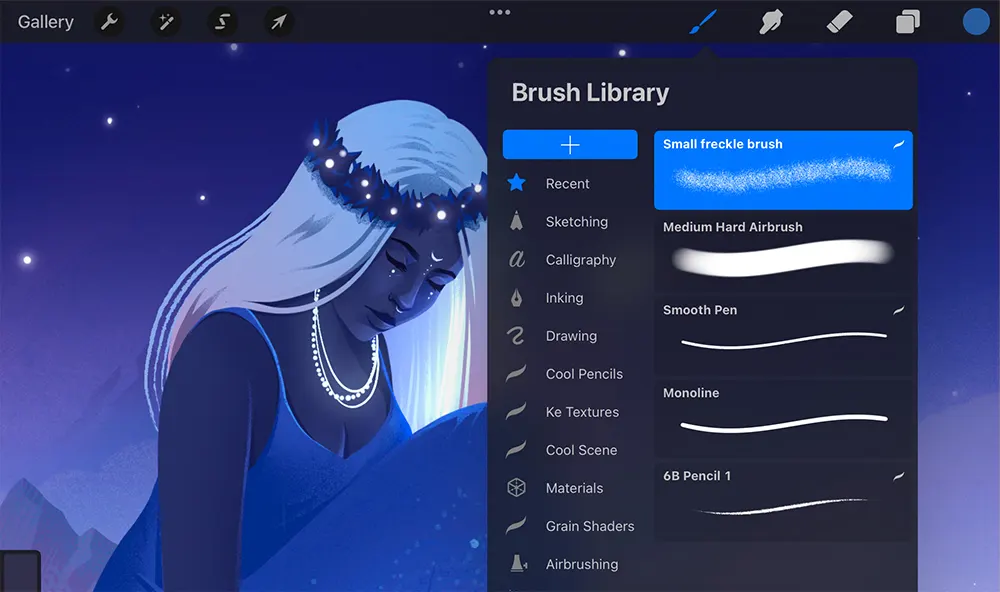
This Procreate 5.2 feature is perhaps my personal favorite 😊
As a Photoshop user I always liked how it has a history of the recently used brushes in the brush menu. And finally, the same long-awaited feature is now available in Procreate as well!
With the latest update your last used brushes are now stored under the Recent tab in Brush Library. For those who struggle to remember all the awesome brushes names in their library (like me) it will be a real time saver.
4. Palette cards
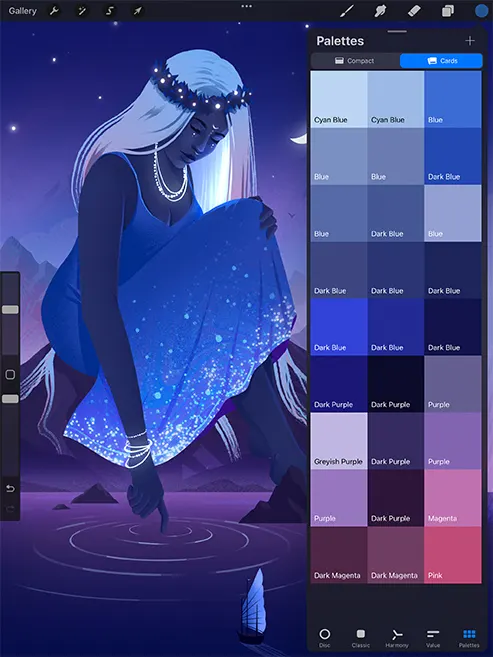
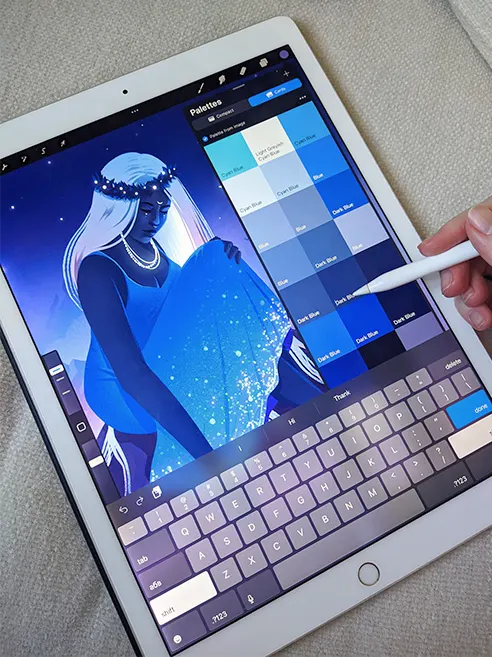
Palette cards is a new fun way of presenting your color palettes. Now you can choose between compact palettes view ( same as prior to 5.2 update )and a new Cards option.
In this mode your colors will appear as big squares with color names on each one. You can change these names as you like. Basically you can leave small notes for your colors.
For me personally color cards occupy too much of the screen as I usually use a variety of shades in one illustration. However, it might be extremely helpful when you have just few colors and want an easy access to them.
5. Page assist (Easy sketchbook mode)
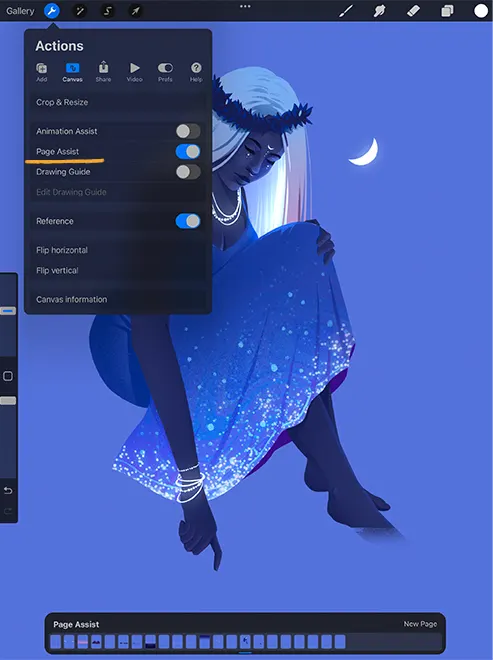
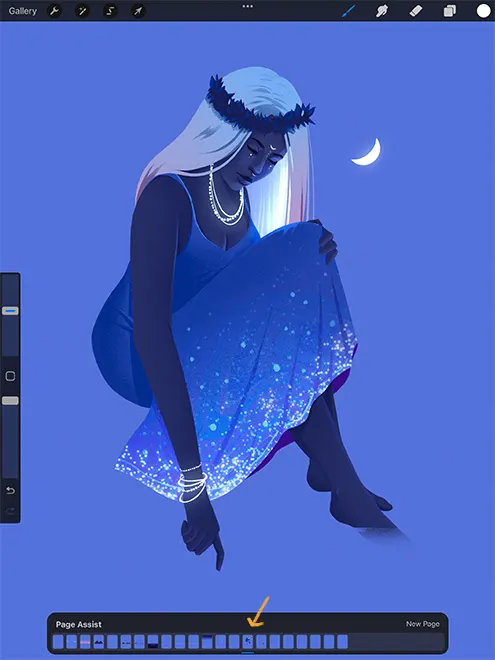
With 5.2. update Procreate has added a new Page assist feature. This mode is accessed via Actions > Canvas menu > Page Assist. It allows you to see each of your layers as an individual page.
With this mode on, all your layers will be seen at the bottom of the screen. If you group some of them, these grouped layers will be shown together as one page.
The logic behind this is similar to animation assist feature we already had. If you decide to export your artwork as a PDF (Actions >Share > PDF) you will have all your layers and groups on separate sheets.
This can be really useful when creating a number of sketches or comics scenes in one document. Even when working on a single artwork having all your layers displayed on the board at once can be pretty convenient indeed.
Conclusion
So how is this latest Procreate 5.2 update? In two simple words – It’s Great! Depending on what you are using it for, you will find some changes more useful than others. But overall, every new feature is fun and definitely worth checking. Be it 3D models adjusting or new Sketchbook options, everyone will find something they can use in their creative process.
I highly recommend you going to your App Store, then click on Procreate, and if you see an update available, click Update.
What about you, what are YOUR favorite new features?