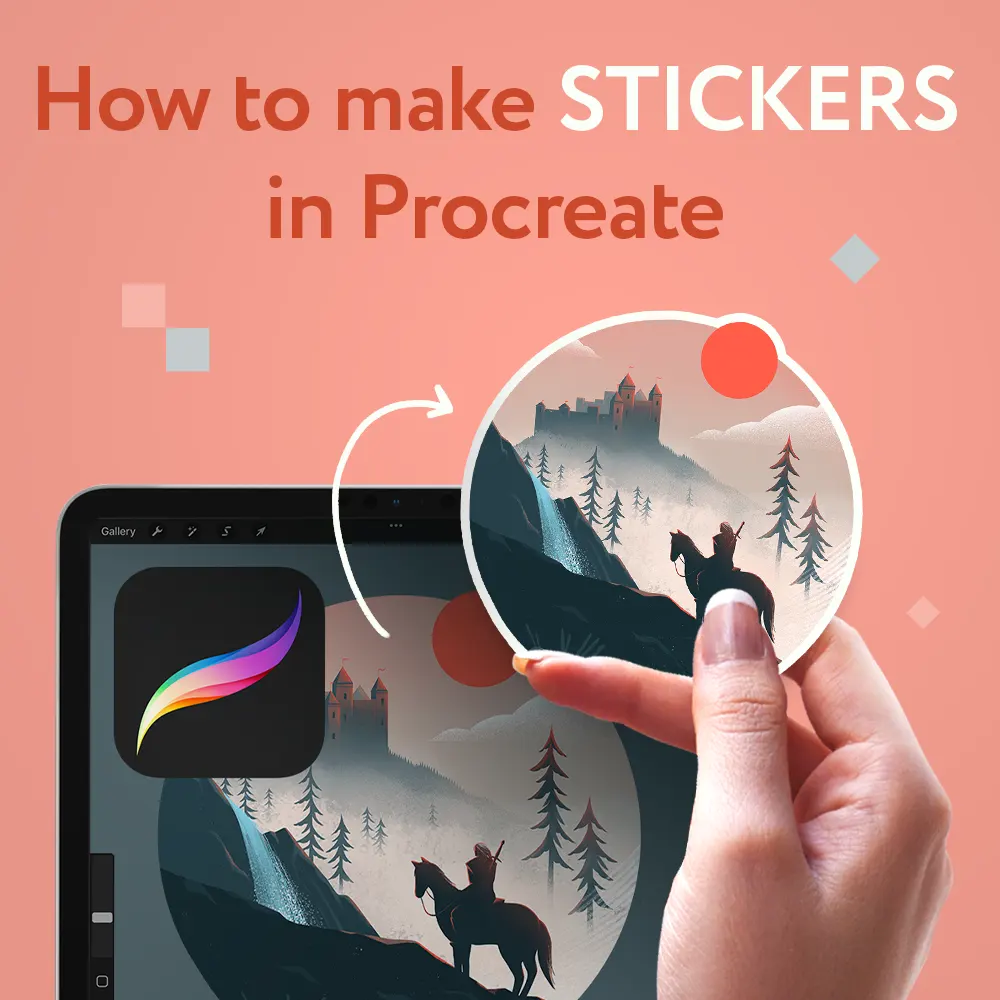
How to Create Stickers in Procreate on iPad
If you want to create stickers, either for printing or your Instagram stories, or a digital planner, Procreate on iPad can do it all for you. You don’t even need a laptop or computer. You can easily create your very own stickers on iPad with this great app.
If you want to know more about Procreate check this post: Why Procreate Is The Best Drawing App For Beginners
In this article I’m going to walk you through the process of creating custom stickers. It is an easy step-by-step tutorial, showing the way I usually create such stickers myself.
1. Tools needed to create stickers in Procreate
You will need these 3 to create stickers:
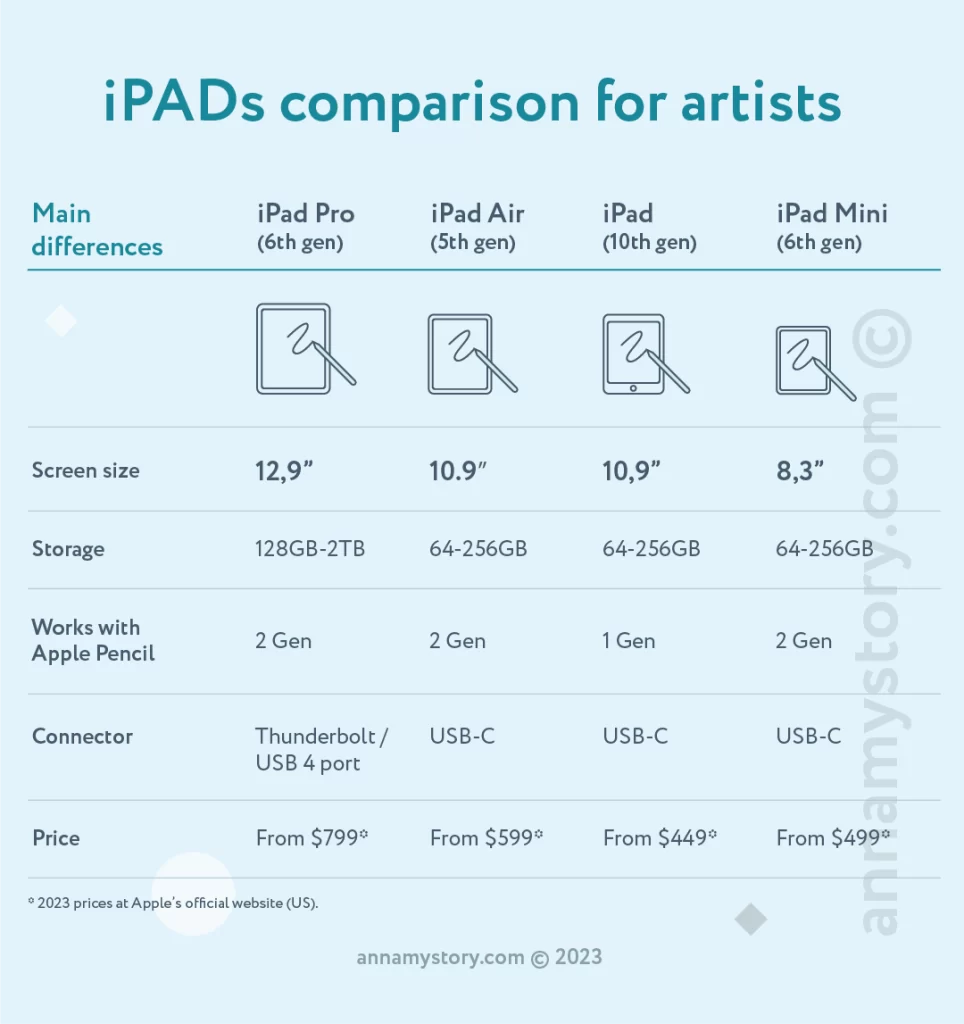
- iPad model that is compatible with styluses. These days there are several models that support Apple pencil, you can see details below:
- Apple pencil or another stylus that works with your iPad. If you want to draw your custom graphics in Procreate, I highly recommend having a proper stylus for this.
- Procreate Well, that’s a must 😊
*In case you want to print your stickers yourself at home you’ll also need a printer, sticker paper and designated software installed on your iPad to be able to send your newly made stickers to print.
2. How to prepare Procreate canvas for stickers
In order to make high quality stickers you will need to create a high-resolution canvas in Procreate. For this you should open Procreate app and tap on Plus “+” icon at top right corner. A screen with Size, Resolution and Color Profile will appear.
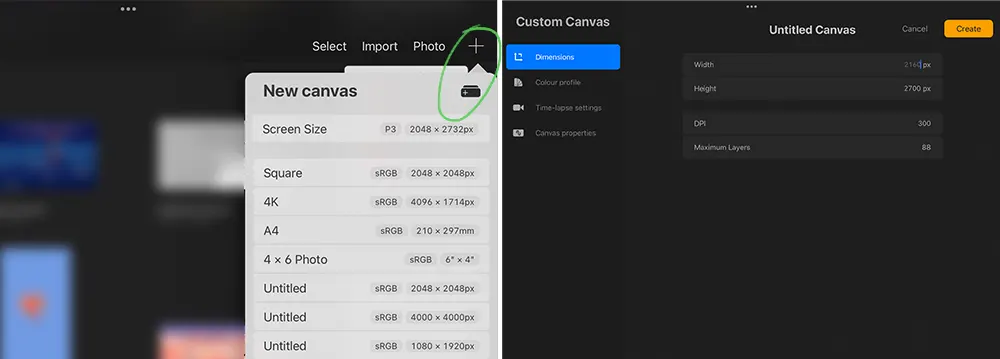
- Canvas resolution I recommend setting it to 300 DPI as it works great for printing. Even if you plan to use your stickers for digital only, you may want to print them out later. It’s a good practice to always keep your initial files as hi-res as possible in case you’ll need this image later.
- Color Profile If you plan to use your stickers digitally, RGB is the color profile you need. In most cases RGB works just fine as many printers nowadays support this profile. Unless CMYK is the specific technical requirement of a printing house / your home printer, I would suggest going with RGB.
- Canvas size If you are going to print your stickers you should choose the size of the paper you intend to use. It depends on where you are going to use them.
For printing house: If you want your stickers printed at a professional printing house you should check their website first. Printing houses usually have all the information about sizes and file preparation on their site and it can differ greatly.
For printing at home: In case you want to print your stickers at home, you should buy special sticker paper and choose your Procreate canvas depending on the paper size.
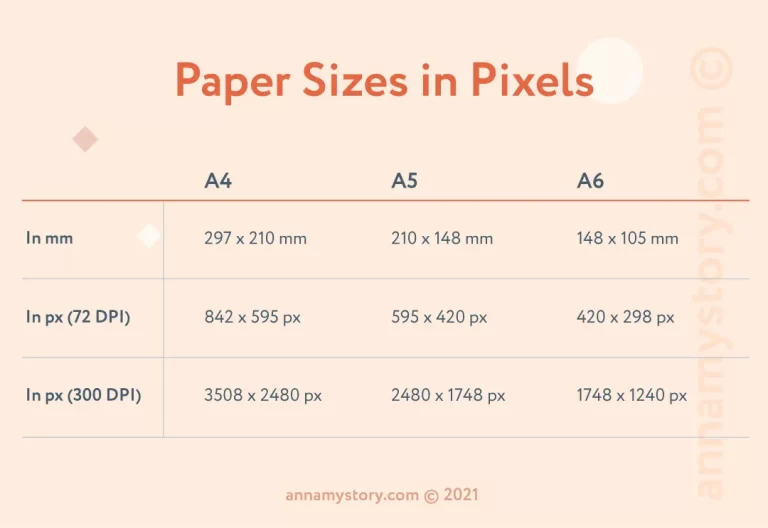
Here are the general sizes in pixels to help you choose:
For digital use: If you do not intend to print your stickers you can choose any canvas size. I would still recommend “the bigger the better” as you might want to use them later.
If you think about selling your custom graphics on POD sites like Redbubble or Society6 something around 4000×4000 px would be a good choice.
3. How to create graphics for stickers
You might already have premade graphics you want to use as stickers. These could be photos, your own drawings or some other images (just remember that it may be ok to use pictures from the internet for your personal needs, but it’s a huge no-no if you want to sell them for profit).
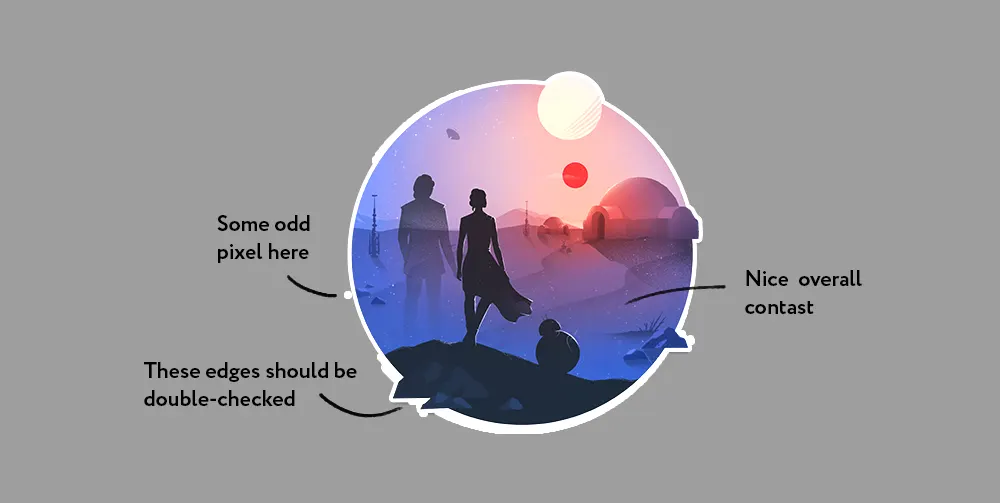
In this case what you need to do is to import these images to your newly created Procreate canvas (tap on Wench icon > Insert a Photo) and make sure they have no unwanted background, ripped edges or odd pixels here and there.
To ensure everything looks clean you need to change the color of your background to a contrast one. Zoom in, check everything and fix things with eraser if needed.
If you want to draw custom illustrations yourself and then turn them into stickers you can either
1) Draw every sticker separately in different Procreate files and then export all of them into one canvas to have a sticker sheet
or
2) Draw everything on one canvas from the beginning
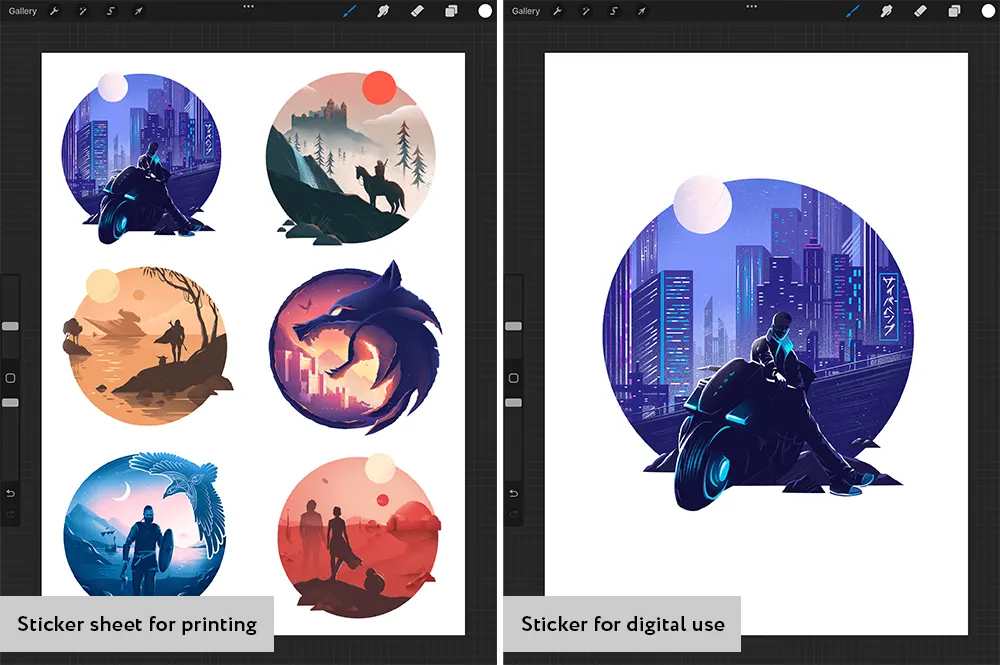
The first way is better if you plan to draw really detailed illustrations which often require more layers. Once ready, you can export all of them to your premade canvas. You can either save them one by one as .png to your gallery and then paste into sticker canvas.
Or you can switch off background layer in each of your files by tapping > Wench icon > Copy canvas, then go back to Gallery and hit Paste in the designated file with sticker canvas.
The second way may suit you if you are planning to make a sheet of simple drawings/text stickers and don’t want to spend much time on this. I recommend making a Group for each of your stickers so it will be easier to rearrange when you are finished.
If you plan to add text to your stickers you can do it by tapping Wench icon >Add Text. Procreate has a library of built-in free fonts you can use for your stickers. You can also import your own favorite fonts in .ttf/.otf/.ttc formats by doing drag-and-drop, bulk import or via AirDrop or preinstalled Files app.
Useful tips for better stickers:
- Make sure there are no half-transparent pixels in your sticker illustrations as they may be poorly printed on paper and be replaced with white color when used digitally.
- It’s better for stickers to have clear edges as well, so they will be printed nicely / the edges won’t appear ripped in digital.
- Contrast is your friend when it comes to stickers both for print and digital use.
- If you design your stickers for print make sure to make complex dark areas a little bit brighter as many printers tend to merge dark colors and make a mess of them.
Once you have all the images you need arranged on your canvas the way you want them to look on your sticker sheet – merge them in a single layer. To do so just select them all in the Layers panel and pinch together.
If you will use your stickers only digitally you won’t need a sticker sheet, just keep every image on a separate layer and make them centered on the canvas.
4. How to make a contour for your stickers
Why would you need a contour around stickers in the first place? It’s really optional if you plan to use them for digital only. Unless nice white edges around the sticker are not a part of your design you can skip this step. If you’re going to sell your creations on POD sites, they usually add white border automatically so there is no need to do it yourself.
However if you want to print your stickers, white contour has a practical use. These white borders act as cutting indicators when printing. This way you ensure your stickers will be full bleed and the edges will be cut correctly.
In Procreate you have 2 ways to create a contour. One is fully manual and takes longer. And the one which is quicker but trickier for beginners.
Method 1:
- Create a new layer underneath your stickers in Layers panel
- Choose a thick Monoline brush from Brush Library and accurately paint the border around your stickers
- Try to make it look neat 😊
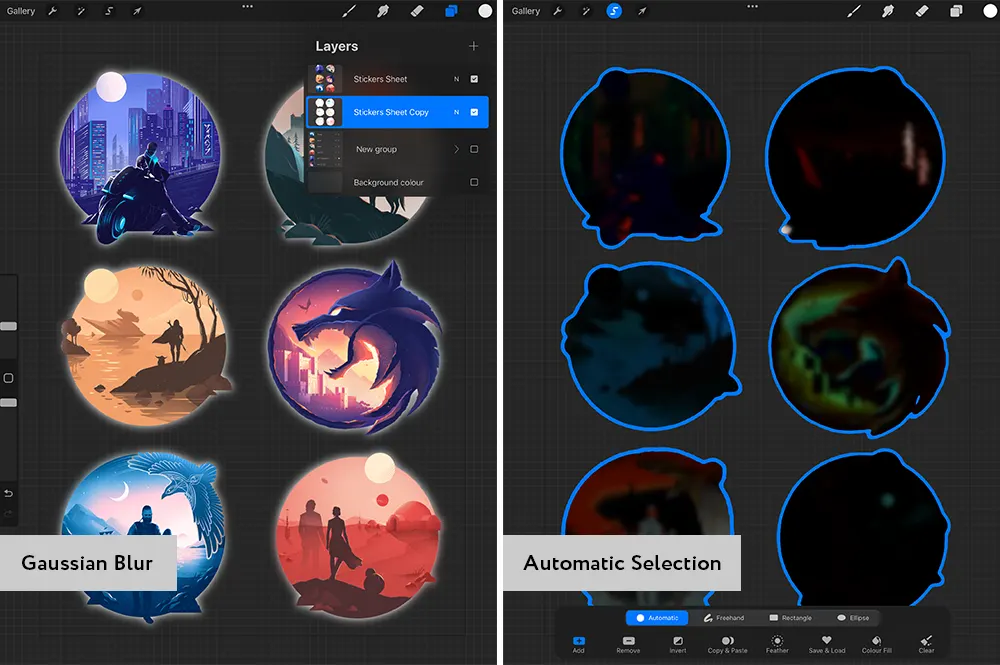
Method 2:
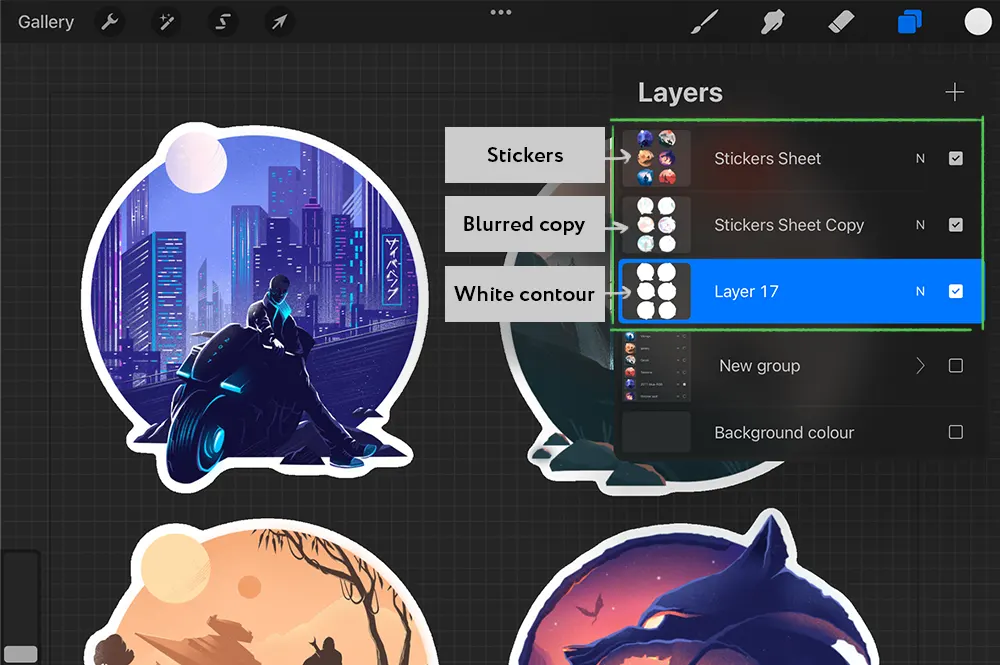
- Duplicate your sticker layer in Layers panel
- Drag a duplicate layer underneath and paint it white
- Apply Gaussian blur effect to it (found under Adjustments icon) until a small border appears around your graphics. For a 4000×4000 canvas Blur around 15% works well.
- Tap on the Ribbon icon and select Automatic selection, adjusting it with by dragging stylus across the screen.
5. With the selection active create a new layer underneath the blurred layer and drag a color circle onto the sticker to color it white.
6. Delete a blurred layer and if you’ve done everything right now you should have a nice white border for your sticker.
7. If some parts of the border are a bit off you can fix them with Monoline brush.
5. How to export your stickers for printing or digital use
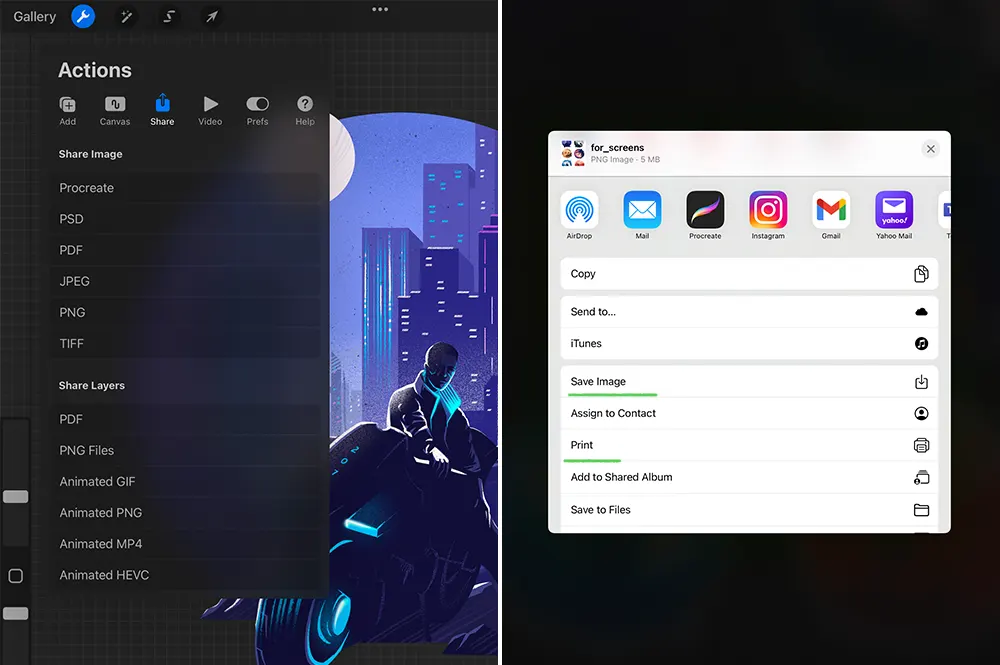
Exporting for Digital use
Whether you want to use your stickers for Instagram stories, digital planner or any other app all you need to do is Save every image separately as .png file. Here’s how to do it:
- Switch the Background Layer off in Layers panel by unticking the box near it
- Make sure only one sticker is visible at a time
- Wench icon > Share > PNG
- Save the sticker to your preferred location.
- Repeat these actions for the other stickers you have in your file by switching layers On and Off.
Exporting for Printing
When saving your stickers for printing keep the white contour you’ve created for them and switch the Background Layer off by unticking the box near it.
You may want to save your sheet as PNG or TIFF file (Wench icon > Share > PNG/TIFF) depending on your printer/printing house requirements.
As an option you can Print directly from your iPad if it’s connected to the printer. After you have selected a file format choose Print option in the Share Menu. That’s it!
Conclusion
Therefore, if you have questions like:
- How to make stickers in procreate?
- Is Procreate good for designing stickers?
- Can you make PNG stickers on iPad?
Then the answers is simple – Yes. As you can see with my tutorial, making your own stickers in Procreate is not difficult at all. After you make one or two, the rest will go even easier. Just follow my instructions and let your creativity fly freely.
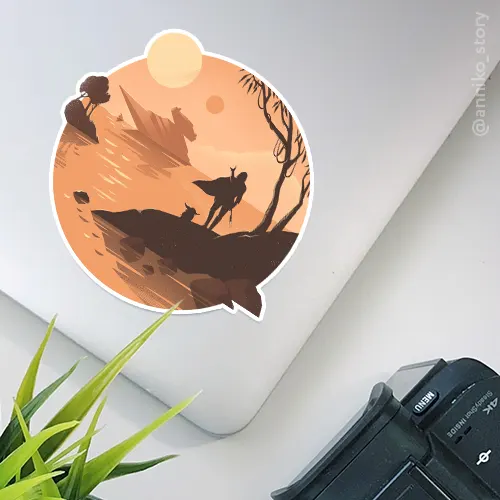
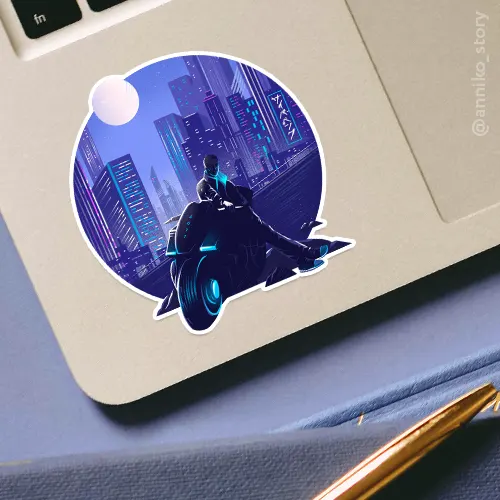
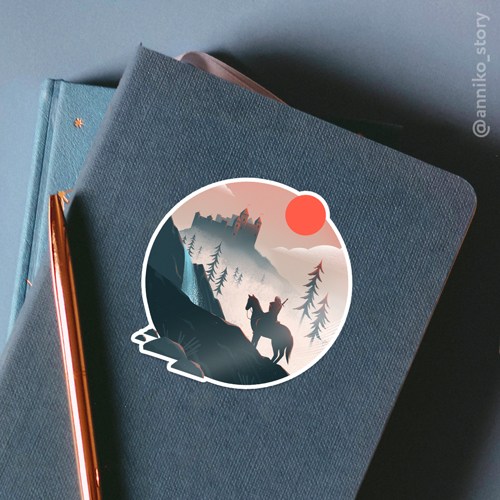
Here’s a couple of examples of stickers I created in Procreate: