Working with Colors in Procreate vs Photoshop
Is working with colors easier in Photoshop compared to Procreate? Or maybe a newer Procreate app is more convenient and has advantages over a long established giant like Photoshop? Which one should you choose as a creative illustrator? Here is my take on this subject.
Photoshop being a much older software with longer development history does provide more options when working with colors. As of right now it offers more sophisticated color management possibilities. Procreate however (particularly after latest 5.0 update) has a couple unique features that stand out and definitely make it worth using. In the end, it all depends on what task you are trying to achieve.
It’s a known fact that Photoshop has long been a number one program for digital creators and is considered a must-have software in creative industries. It contains plenty of useful instruments and options for your convenient work.
At the same time, Procreate has been steadily gaining popularity and well-deserved reputation since its release due to a wonderful set of features and constant improvement. I do work with both programs, because they each provide a great functionality when creating artwork.
In this article, I cover main advantages of both Photoshop and Procreate for iPad in terms of working with color. If you need a more general comparison of Photoshop and Procreate you can read the full article.
When comparing these programs I look at both from perspective of options I have while working with Color Profiles and pallets, doing the recoloring and color adjustments. And also what blending modes I can apply.
1. Color Profiles in Photoshop vs Procreate
Photoshop:
If you go to Photoshop’s color settings, you will find plenty of color profiles you can apply to your document. There are different profiles for screen and for print. To put it simple there is a setting pretty much for any occasion.
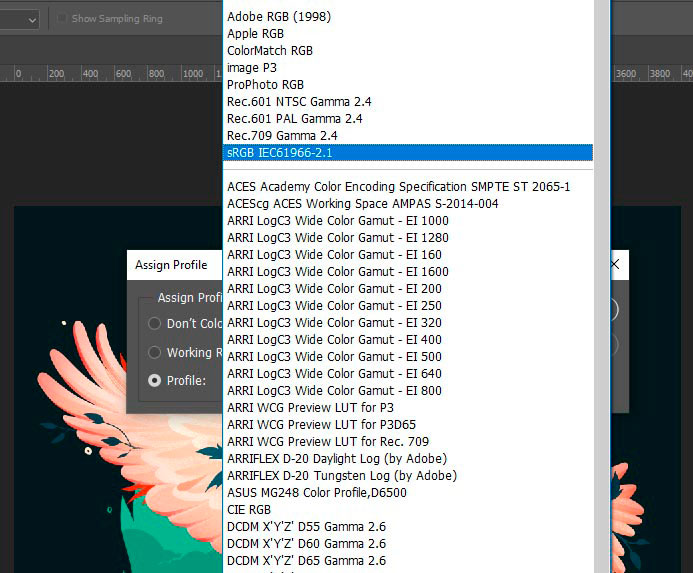
You will probably never need to use more than 5 different profiles in all your career but it’s always nice to have a choice, right?
What’s more, you can import and install a custom color profile. It is a very useful option when you work on the same files with someone else and need the colors to match perfectly.
But that’s not all, you can also assign different profiles to your documents while still working on them. So if you work on an image and decide to print digital artwork, it’s super easy to do.
Procreate:
In procreate you can choose from sRGB, P3 Wide Color, or CMYK options. And just like in Photoshop, you can import your own custom color profile.
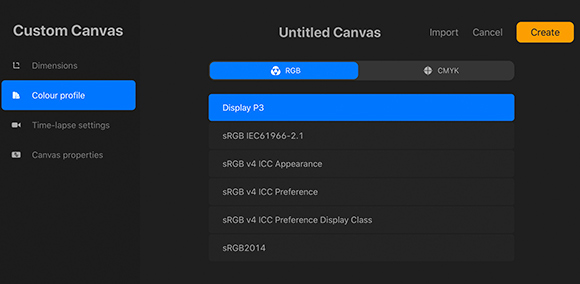
The important note: you can not however change a color profile of the existing artwork. This means if you start working in RGB, you won’t be able to convert it to CMYK on the go.
2. Color Palettes in Photoshop vs Procreate
Photoshop:
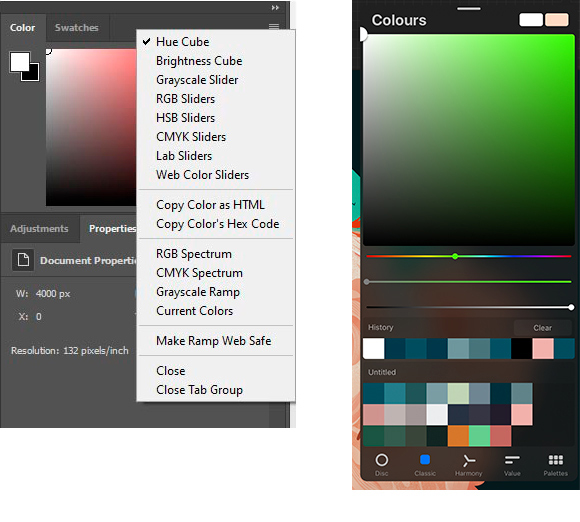
There is a variety of color tab’s view modes you can choose from in Photoshop. You can select a color wheel, different sliders or spectrum view – whatever you find more convenient.
I personally prefer a Hue Cube as it seems more representative, but it’s all a matter of personal preference.
If you open a Swatches tab you can see the history of recent colors you have used. It’s pretty handy when it comes to digital drawing or working with brand colors for a client. Keep in mind though that you can not save these colors for future; using new colors will override the old ones.
Procreate:
In Procreate you can choose between Disc, Classic, Harmony and Value view modes. Disc matches Color Wheel in Photoshop, Classic is a Hue Cube, and Value view stands for Sliders.
Harmony view was added with the recent 5.0 update and represents an interactive color wheel which helps you to choose harmonious colors and is great for learning color theory basics.
What’s more, there is a separate tab for all your palettes, which you can save, change and use as default to be shown under your color tab. It’s a really great feature which Photoshop currently doesn’t have. I have at least 10 different palettes saved so I can draw series of artworks in the same color tones or work with clients’ brand colors without constantly picking into their brand guide.
3. Recoloring in Photoshop vs Procreate
Photoshop:
You’ve got several options to recolor an object on your layer in Photoshop:
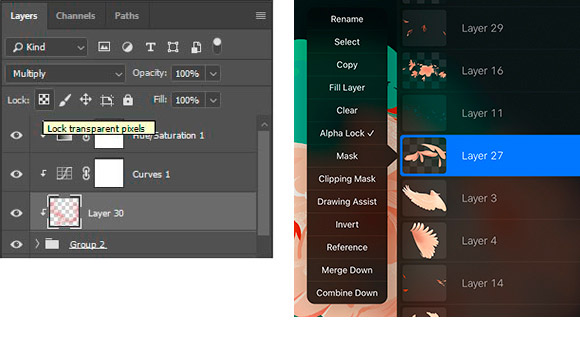
– Use adjustments from Image > Adjustments menu or as a clipping mask from the bottom of Layers menu. There are plenty of options like Levels, Curves, Hue/Saturation, Channel mixer etc. for achieving the best results you need.
– Lock Layer transparency from the Layers menu and paint over your object with a brush, or fill it with Paint Bucket or Gradient tool.
– Do the same as above but on a separate layer above the one you want to recolor and make it a clipping mask. It’s really convenient if you think you may change your mind later. If so you can just delete the clipping mask or lower it’s transparency or erase parts of it.
– Go to the layer properties by double-clicking it in the Layers panel and apply Color, Gradient or Pattern overlay to the whole layer.
Procreate:
This is how you can recolor an object in Procreate:
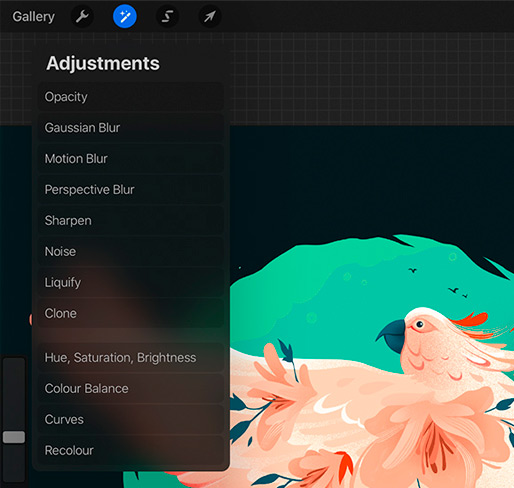
– Same as in Photoshop you can apply adjustments to your layer by managing the hues, intensity, and tonality of your colors. It includes Hue/Saturation, Color Balance, Curves and Recolor options.
– Or you can lock Layer transparency from the Layers menu and paint over your object with a brush (unlike Photoshop there are no Gradients or Patterns in Procreate)
– You can also drag a solid color which is currently selected from the upper right corner and apply it to your object.
As you can see there are plenty of options if you want to change colors in both programs. Photoshop’s set is much broader though. (No wonder, as this program was first specifically created to work with photos).
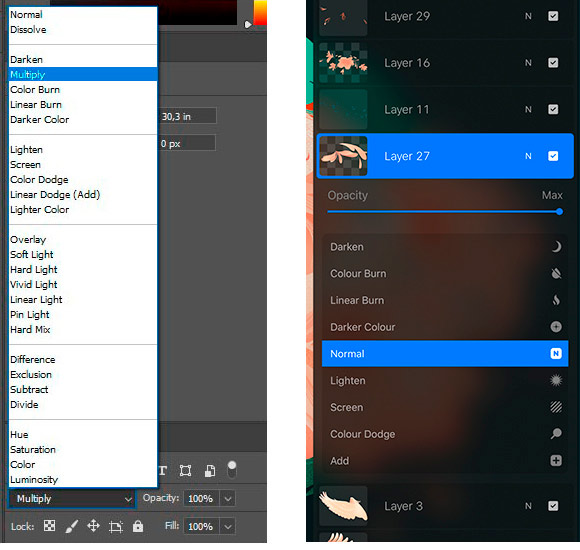
4. Blending modes in Photoshop vs Procreate
Blending modes in Procreate is pretty much the mirror option of the modes in Photoshop. To be honest it is rather convenient for Adobe users who want to try this program on iPad.
These modes allow you to modify the look of your layer and underlying objects by playing with colors and opacity (like colorful glass you can look through). These are the blending modes sorted by category:
- Darken: Multiply, Linear Burn, Color Burn, Darken (great for drawing shadows)
- Lighten: Lighten, Screen, Add, Color Dodge (for strong highlights)
- Contrast: Overlay, Hard Light, Soft Light (cool for subtle highlights)
- Difference Exclusion, Difference, Subtract (I use these quite rarely for unexpected effects 🙂
- Color: Hue, Saturation, Color, Luminosity (allows to change colors of the underlying layer quickly)
5. Color adjustments in Photoshop vs Procreate
Photoshop:
As I’ve mentioned before there is a whole bunch of different adjustments you can apply to your graphics.
These special filters allow you to quickly change pretty much every color aspect you need and achieve really cool results without manual recoloring. Some of them were originally made for color retouch but are equally useful for working on digital art.
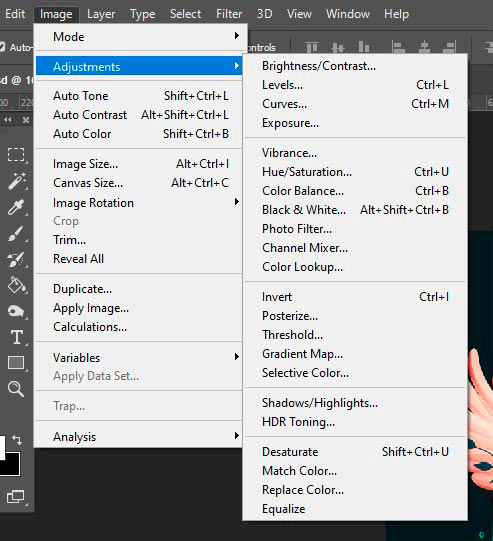
What’s more, these adjustments can be implemented to groups of layers, unlike Procreate where you can edit only one layer at a time.
Procreate:
Procreate currently has just 4 adjustment options. It seems too humble at first, but I should give them a credit, these are the ones you usually use the most.
The main inconvenience is that you can not apply these adjustments to all your layers at once without flattening them first. That’s why it’s still easier for me sometimes to jump into Photoshop for the final touches.
Conclusion
Both programs are great for creative artists. Each has its unique set of features worth trying and mastering. The difference could be found when facing a specific task to do. For example Adobe Photoshop does have more options that are necessary when preparing an image for printing. At the same time Procreate offers a more fun experience when working with palettes. So depending on what you do more often both applications can meet all your needs.
If you found this article helpful – consider Subscribing to my blog and sharing this post 🙂
Save in Pinterest for later 😉